How to Transfer Videos from iPhone to Computer for Free
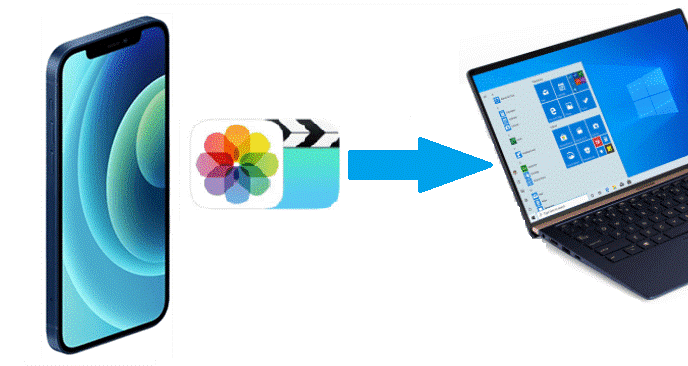
Do you have a lot of videos on your iPhone or iPad? Videos are often very large files that can take up a large amount of storage space. If your device is running out of storage space, transferring the videos from your iPhone/iPad to the computer is a good way to free up some storage space. Also, it is helpful to keep a safe backup of your important videos to avoid unexpected data loss on your iPhone or iPad.
There are several ways to do this on both Mac and Windows. In this article, we will introduce 7 ways so you can learn how to transfer videos from iPhone to computer easily and quickly. All these methods work well on all iPhone models and iOS versions, including the latest iPhone 14/14 Pro/14 Pro Max, iPhone 13, iPhone 12, and iOS 16.
Part 1. How to Transfer Videos from iPhone to Computer in One Click
To do the iPhone video transfer, iPhone Transfer is strongly recommended. It is a professional iPhone data management tool that helps to transfer all your iPhone contents to your computer, including videos, music, photos, contacts, text messages, WhatsApp, and more. If you have large amounts of videos on your iPhone that eat up too much storage space, you can use this software to transfer videos from iPhone to PC or Mac in just a single click.
Here’s how to get videos from iPhone to Computer in one click:
Step 1: Download and install the iPhone Video Transfer onto your computer and then connect your iPhone or iPad using a USB cable. Unlock the device and “Trust this Computer” when promoted. This will allow the program to detect the computer.
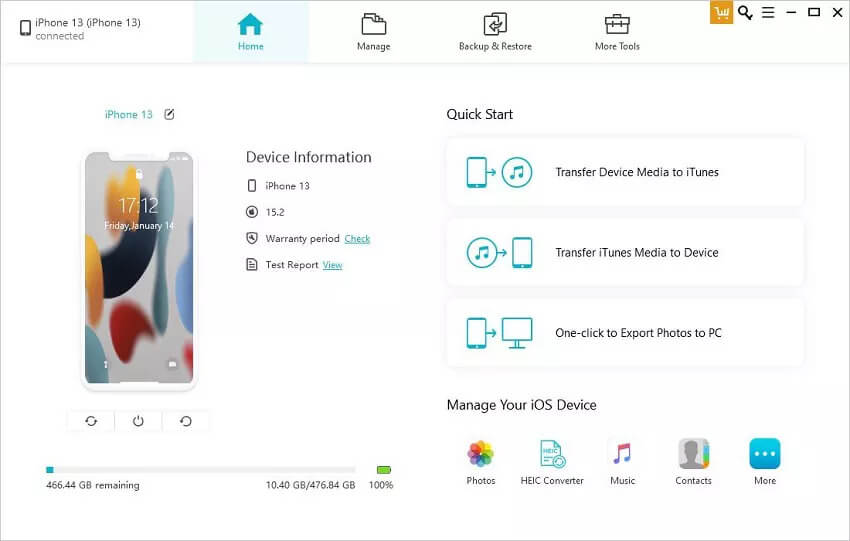
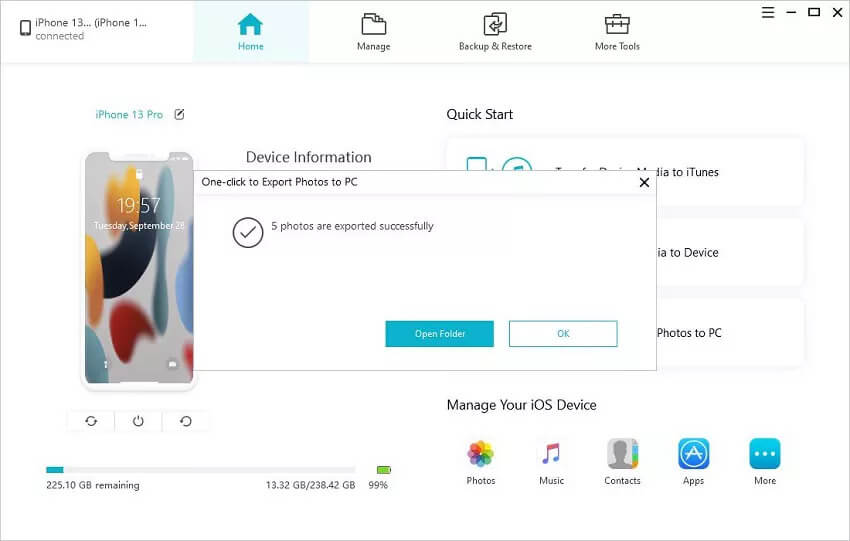
Step 2: Once the device has been successfully detected, click on “One-click Export Photos to PC” to begin the video transferring process.
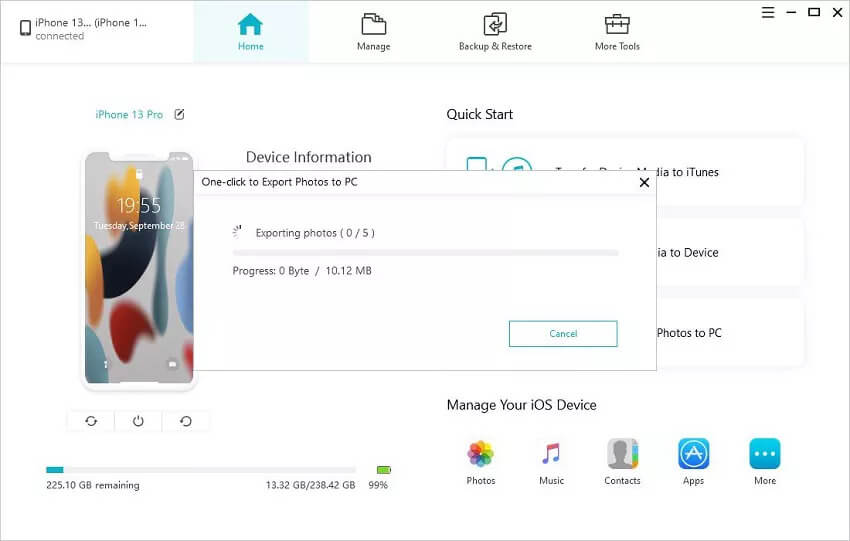
Step 3: All the photos and videos on your device’s Camera Roll will be transferred to the computer. Click on “Open Folder” in the popup to view the transferred videos on your computer.
Part 2. How to Transfer Videos from iPhone to PC/Mac with iCloud Photos
With iCloud Photos, you can easily access the photos and videos on all your Apple devices, including iPhone, iPad, iPod touch, Mac, iCloud.com, and even your PC. If needed, you can easily download these photos and videos to your computer. Make sure both your iPhone and computer are connected to a Wi-Fi network and then follow the steps below to transfer videos from iPhone to computer:
Step 1: On your iPhone or iPad, navigate to Settings > [Your Name] > iCloud > Photos, and then make sure that iCloud Photos is turned on.
![[7 Ways] How to Transfer Videos from iPhone to Computer](https://www.getappsolution.com/images/20210330_606284d81299e.jpg)
Step 2: Now set up iCloud on your computer and sign in with the same account, then turn on iCloud Photos.
- For Mac: Go to System Preferences > iCloud. Next to Photos, tap on “Option” and then choose “iCloud Photos”.
- For PC: Download iCloud for Windows and follow the steps to set up iCloud Photos, tap “Done” and then click “Apply”.
Well done. All the photos and videos saved on your iOS devices will be easily accessed and viewed on your PC or Mac computer. For Windows users, you can head to This PC > iCloud Photos > Downloads to get all the new photos and videos from your iPhone/iPad. If you don’t want to install iCloud for Windows on your computer, you can visit iCloud.com to download the videos.
Part 3. How to Transfer Videos from iPhone to Windows PC (3 Ways)
You can also use the following 3 methods to transfer videos from your iPhone to PC, using the Photos app, AutoPlay feature, or Windows/File Explorer.
Copy Videos from iPhone to PC via Photos in Windows 11/10
You can easily use the Photos App in Windows 10 to copy videos from your iPhone to your PC. Follow these simple steps to do it:
- Connect the iPhone to the Windows PC using a lightning cable. Unlock the iPhone using your password and tap on “Trust” when prompted.
- Open the Photos app on your computer and go to Import, then choose “From a USB device”. The app will search for new photos and videos on your iPhone.
- Click on the “Import Settings” to edit the import destination and even choose if you want to delete the videos on the iPhone after importing them. Click “Done” after setting your preferences.
- Now choose the videos you would like to copy to your computer and then click “Import Select”.
![[7 Ways] How to Transfer Videos from iPhone to Computer](https://www.getappsolution.com/images/20210330_606284d827204.png)
Get Videos from iPhone to PC with AutoPlay in Windows 7
If your computer is running on Windows 7, you can make use of the AutoPlay feature to get videos from your iPhone to the PC. Here’s how to do it:
- Plug your iPhone into a PC with a USB cable and “AutoPlay” should appear automatically.
- Select “Import pictures and videos” in the AutoPlay window.
- You can select the folder you would like to store the videos in the “Import Settings”.
- Choose the videos that you want to import and then click on “Import” to start the process.
![[7 Ways] How to Transfer Videos from iPhone to Computer](https://www.getappsolution.com/images/20210330_606284d8379ed.png)
Move Videos from iPhone to PC via Windows/File Explorer
You can also get videos off your iPhone using Windows or File Explorer on your PC. Follow these simple steps:
- Connect the iPhone to your Windows computer, open “This PC” and locate the device.
- Right-click on the iPhone name and then select “Import pictures and videos”.
- Click on “Review, organize, and group items to import” or “Import all items now” and tap “Next” to proceed.
- Choose the videos you would like to save and click “Import”. The process may take some time depending on the number of videos you want to move.
![[7 Ways] How to Transfer Videos from iPhone to Computer](https://www.getappsolution.com/images/20210330_606284d84d3c2.png)
You can also go to This PC > your iPhone name > Internal Storage > DCIM > 100APPLE to move the videos from your iPhone to your PC.
Part 4. How to Transfer Videos from iPhone to Mac Computer (2 Ways)
The following are the best two ways to transfer videos from iPhone to Mac, using the Photos app or AirDrop.
Upload Videos from iPhone to Mac with the Photos App
You can import the videos from your iPhone to your Mac using the Photos App. Here’s what you need to do:
- Begin by connecting your iPhone to the Mac with a USB cable. Open “Photos” and then select the iPhone in your “Devices” section.
- Click on “Import” and select the videos you want to move, then tap on “Import Selected” to begin the transferring process.
- The videos uploaded to your Mac will be saved in the Photo Library folder. To access them, you can follow these simple steps:
- Go to “Finder > Pictures” and right-click on the “Photo Library”, then select “Show Package Contents”.
- Click on the “Masters” folder to find the iPhone videos you have imported.
![[7 Ways] How to Transfer Videos from iPhone to Computer](https://www.getappsolution.com/images/20210330_606284d9c45f4.png)
Import Videos from iPhone to Mac using AirDrop
If you don’t want to connect the iPhone to the Mac using a USB cable, you can use AirDrop to send videos from iPhone to Mac. The process is very easy. Just follow these simple steps:
- Turn on AirDrop on your Mac. You can do that by going to “Finder > Go > AirDrop” and then ensuring that Bluetooth and Wi-Fi are turned on. You should also set the option “Allow to be Discovered by” to “Everyone” or “Contacts Only”.
- On your iPhone or iPad, access the Control center and then tap on “AirDrop”. Here, set it to “Contacts Only” or “Everyone”.
- Now open the Photos app on your iOS device and then select the videos that you would like to transfer to the Mac.
- Tap on the “Share” icon and then select the Mac in the “AirDrop” section. The selected videos will be transferred to the Mac immediately.
![[7 Ways] How to Transfer Videos from iPhone to Computer](https://www.getappsolution.com/images/20210330_606284da070ba.jpg)
Conclusion
The above are 7 ways to transfer videos from iPhone to a Windows PC or Mac computer. Absolutely, the method in Part 1 is much easier and more convenient than others. It can transfer all videos in one click and has no harm to videos. All transferred videos will be kept in their original resolution. If your iPhone is not showing up in Windows when you plug it in, please go to How to Fix iPhone Not Showing up on PC to find a solution.
How useful was this post?
Click on a star to rate it!
Average rating / 5. Vote count:

