How to Recover Deleted Videos on Windows

When you are getting ready to upload your new screen recording video on Youtube and only find that you have accidentally deleted it, you must be very frustrated and disappointed. Luckily, it is possible to recover deleted videos from the PC. This tutorial will give you a professional and safe way to retrieve deleted videos from computers running on Windows 11, 10, 8.1, 8, and 7.
How to Recover Deleted Videos on PC
Why Is Deleted Video Recovery Possible?
NOTE: First things first, stop using your computer until the deleted videos are recovered!
The deleted videos actually exist on your hard drive as long as their space is not overwritten by new data. If you continue to use the computer to, for example, start a new screen recording or download apps, new data will be created, which may overwrite the deleted videos. So don’t do anything on your computer before you have restored the deleted video file.
Tutorials on Retrieving Deleted Videos on PC
You can check Recycle Bin for the deleted video files. If you find a missing video there, you can simply right-click it, then click on “Restore” to undelete the video. The video will be restored to its initial location on your computer. If you have emptied the Recycle Bin, you can recover your deleted video files from your PC through data recovery software.
Data Recovery is a professional data recovery program that can retrieve lost/deleted videos from a PC, whether the videos are deleted by accident or are lost because of partition formatting, RAW hard drive, data system damage, etc. The program could help you recover deleted video files with a few simple steps on Windows 11/10/8/7.
Apart from deleted video recovery, Data Recovery can also recover deleted images, audio files, documents, and emails from a PC.
Important: You should download Stellar Data Recovery on the drive that is different from the location of the deleted video files. For example, if the videos are saved on an E drive before they are deleted, you should install Data Recovery on a D drive or C drive.
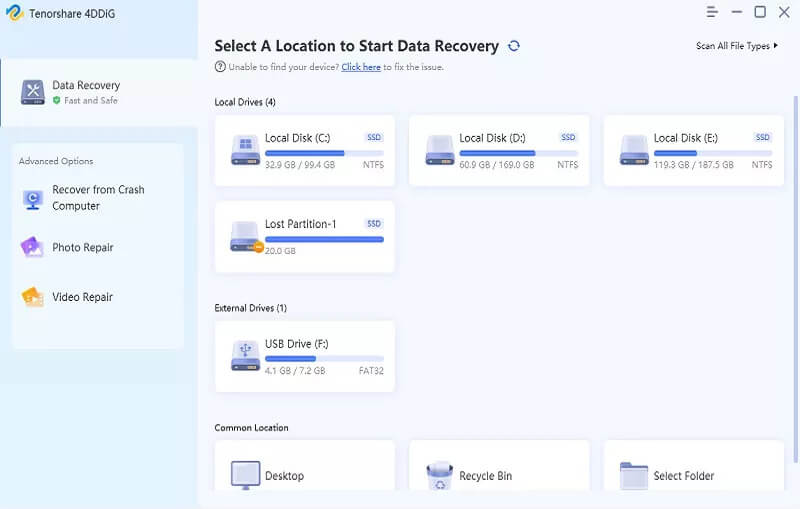
Step 1. Choose File Types and Hard Disk Drive
Run the program. You are able to select the file types you need on the main interface. Tick the box of the Video. Then, select the drive that the videos are deleted from.

Step 2. Start Scanning Deleted File
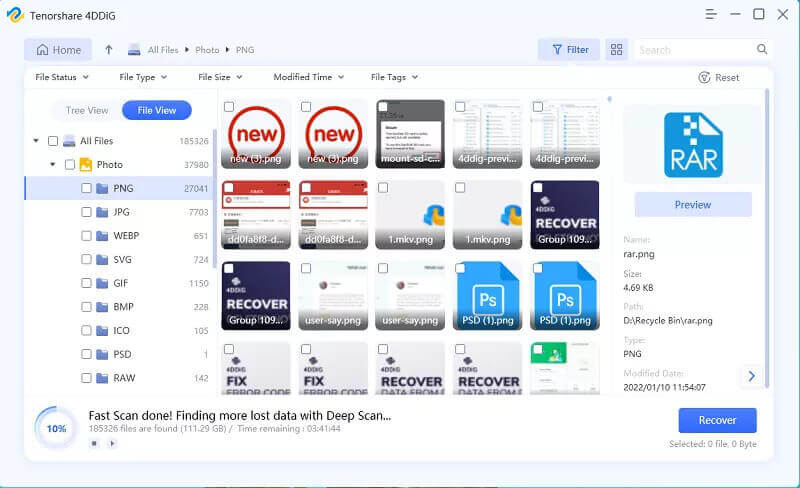
Click on the “Scan” button to start scanning deleted video data on the drive you choose. The program provides users with two modes: quick scan and deep scan.

Step 3. Recover Deleted Video
When the scanning is completely done, you can find out the deleted video you want to retrieve. Then click on the “Recover” button. Wait for a moment, the files you selected will be retrieved on your computer.

After that, you can check the video on your computer or upload it on YouTube.
Extra Tips: Quick Way to Convert Video Format
If some of your videos can’t be played on some devices because of their format, you can use PonePaw Video Converter Ultimate. This program is equipped with advanced HD video conversion technology, which converts videos or audio into different formats, such as MKV, AVI, WMV, MP4, FLV and MP3, WAV, M4A, WMA, or GIF.
- Launch the program, click the “Add Files” button at the top left to browse your folders, and load your desired video files to the program.
- Click the “Profile” button at the bottom to select a suitable format, and choose a destination folder.
- Click the “Convert” button to start converting. After converting videos to another format successfully, find the converted files by clicking “Open Folder”.
If you still have questions, you can just leave a message in the following comment area.
How useful was this post?
Click on a star to rate it!
Average rating / 5. Vote count:

