How to Restore iPhone without iTunes
iPhone is powerful, not inferior to a home personal computer. But the iPhone is in the threat of data loss than PC. Having iPhone stolen, delete accidentally, resetting iPhone to factory default settings, or jail-breaking, upgrading the iOS system may probably cause data loss. So we have to figure out how to restore iPhone without iTunes. One effective solution to the above problem has been found and introduced below.
iPhone Data Recovery is an easy recovery tool used to help iPhone users recover photos, messages, notes, voicemails, call history, and more. It now can work in three ways, which are shown in detail below.
You can download a free trial version of the iPhone Data Recovery below and have a test.
Part 1: Restore iPhone from iTunes Backup
Step 1 Launch iTunes and connect the iPhone to iTunes
Open iTunes on the Mac or PC that you used to back up your device. Connect your device to your computer with a USB cable. If a message asks for your device passcode or to Trust This Computer, follow the onscreen steps.
Step 2 Restore iPhone from the previous backup
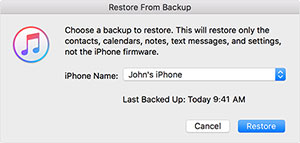
Select your iPhone, iPad, or iPod touch when it appears in iTunes. Look at the date and size of each backup and pick the most relevant one. Click Restore and wait for the restore time to finish. If asked, enter the password for your encrypted backup.
Note: The method will replace your old data. If you need to recover your iDevice data selectively, you need to try recovery software.
Part 2: Steps of restoring iPhone without iTunes from backup
Step 1. Run the program & Connect iPhone to the computer
Launch the program on your computer. Run the program on your computer.
For users of iPhone 6s/6s Plus/6/6 Plus/5S/5C/5/4S is found, you will get the interface as below. Move to “Recover” section, choose “Recover from iOS Device” in “Recover iOS Data” and click “Start Scan”.
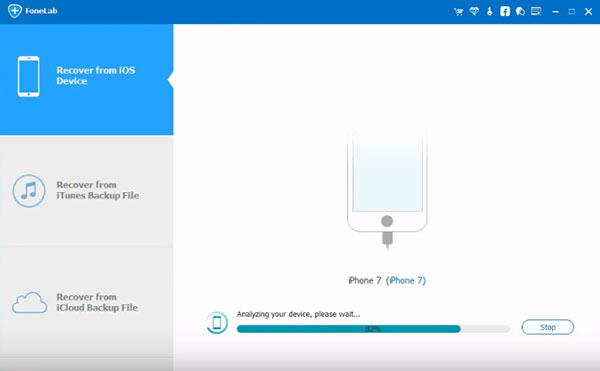
For users of the iPhone 4/3GS, you will get the main interface as below. Choose “Advanced Mode” in the bottom right corner to get a deeper scan.
Step 2. Scan your iPhone to find the lost data
For iPhone 6s/6s Plus/6/6 Plus//5S/5C/5/4S user, it will be more simple. Just click “Start Scan” to search for deleted data directly.
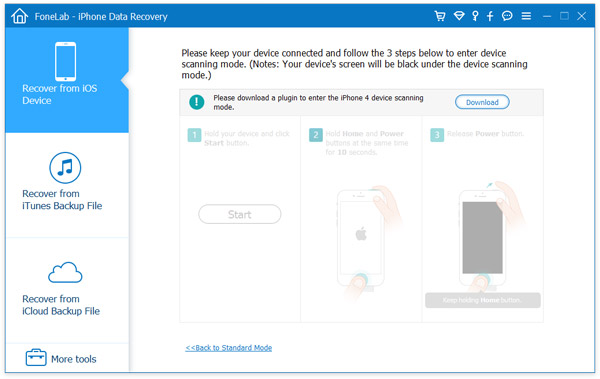
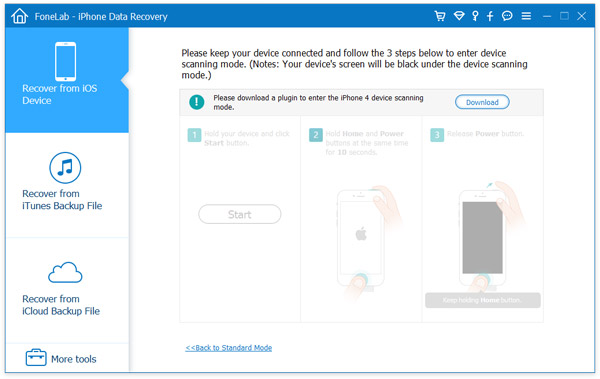
For iPhone 4/3GS users, you need to follow the steps below to enter the device’s scanning mode.
1. Click the “Start” button in the interface.
2. Hold the “Power” and “Home” button for exactly 10 seconds.
3. Release the “Power” button after 10 seconds. Keep pressing “Home” for another 10 seconds. And the system will notify you that you’ve entered the scanning mode. Then you can release the “Home” button.
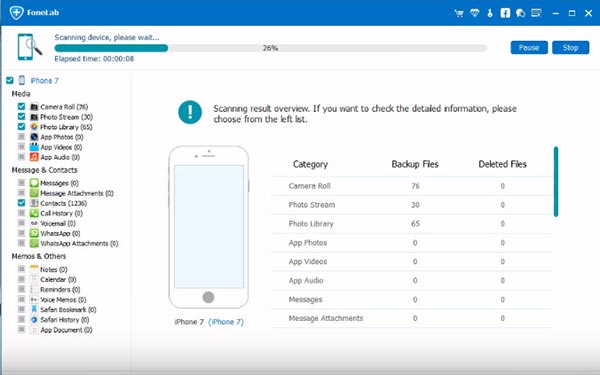
4. Now the program begins to scan all the data on your iPhone.
Step 3. Preview & Restore iPhone data directly
After scanning, all data in your iPhone will be list in the left column of the interface. Preview items first and choose any item you want and click “Recover” button to restore your data.
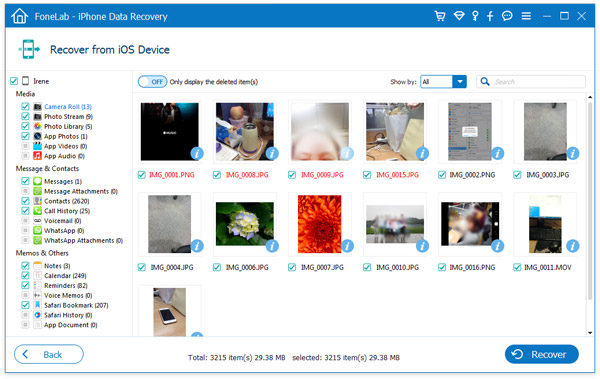
Deleted: Note: All data on your iPhone are found and list in the window. You just need to restore those you’ve lost. To easily find your list data, slide the top button to “On” to only display those deleted items.
How useful was this post?
Click on a star to rate it!
Average rating / 5. Vote count:


